.}
Showing posts with label my house. Show all posts

Monday, February 24, 2014

My kitchen sink and faucet

A few years ago, when we were building our house and designing our kitchen, I wrote a post on the kitchen sink decision.  It is a detailed post with lots of beautiful images and over 100 helpful and interesting comments from readers.  In this post, I discussed options I was thinking about for the sink itself, the location of the sink, and the style of faucet.

Many people are finding this post through google searches, and every week I receive questions about my kitchen.  A lot of people must have started kitchen renovations in January, because I have received dozens of emails over the past month asking for input and guidance on kitchen decisions, whether it be countertops, cabinets, appliances, or kitchen sinks. 

Lately I have been receiving quite a few emails asking what kitchen sink and faucet I selected for my kitchen, so I thought I would write a blog post on the topic. 

Here are the decisions that my wonderful kitchen designer Cynthia Ziegler and I made for my own kitchen, and how I feel about the decisions now that I have lived in the house for a few years. 

Sink:
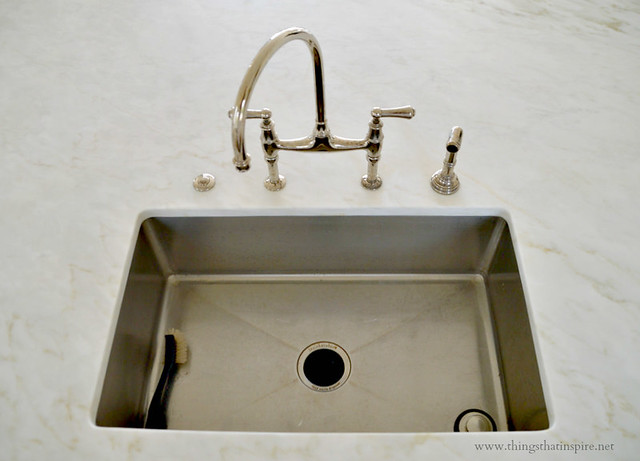
In my old house (which I did not build), I inherited a double bowl sink that had a smaller raised section above the disposal. I hated this sink, and when researching the topic of kitchen sinks, realized that I really don’t like double section sinks. I felt certain that I would prefer having a big sink with a single bowl.  I have been very happy with this decision. 

My kitchen designer recommended a Franke 30”x18”x9” sink because they have worked well for her on past projects.  The sink is stainless steel, and I have also been happy with the material. It looks great with the style of the kitchen, and can take a real beating. If it ever gets discolored I simply wipe it with a Mr. Clean magic eraser, which is one of the most indispensible items in my cleaning closet.

We have two sinks in the kitchen, and both have the same Franke sink.

Faucet style and location of the sinks:
We decided to have two sinks in the kitchen that each have their own function, and selected similar but somewhat different faucets at each of the sinks based on location and space constraints.
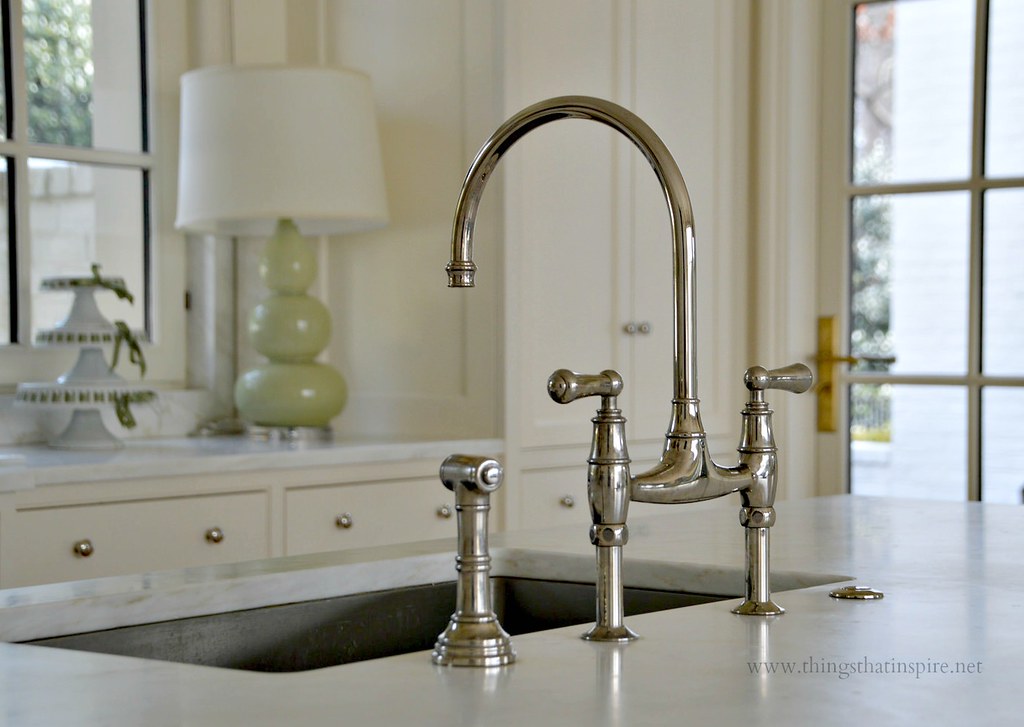
For the kitchen island sink, we used the Perrin & Rowe deck mount bridge faucet with high C spout faucet in polished nickel, with matching sidespray. My architect gave me a heads up that polished nickel gets water spots, but this has not bothered me at all and they polish right out with the Cape Cod metal polishing cloths (more about that later).  We picked this faucet because it is so beautiful, and the island is so visible in the kitchen – and therefore the faucet is very visible.  It’s a beautiful faucet, and quite sculptural.  Note – I had not polished the faucet yet when I took this picture, so this shows two years of water spots. The polishing made it look like new!

I was worried that I would not like having a separate lever for hot and cold, and a separate sprayer. However, I quickly got used to it and I love the faucet we selected.  I use the cold much of the time, and simply add a bit of hot when I want hot or warm water. I also enjoy having a lever devoted to hot water when I am filling up a pot for cooking or washing pots and pans (the island sink is where I do most of the cooking prep and clean up, as it is opposite the stove and range).

The little button to the left of the faucet is an air switch that controls the disposal, also in polished nickel.

As mentioned above, the kitchen island sink is where most of the cooking prep and clean up occurs.
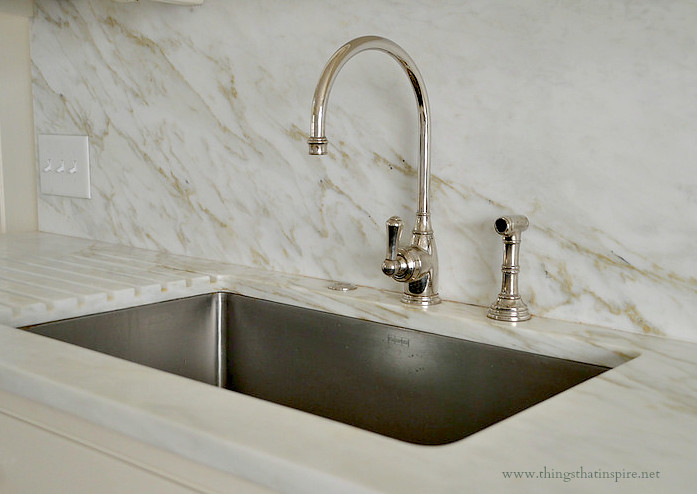
We decided to place our second sink on a wall in the kitchen.   It was a bit of a design challenge but it made sense based on the kitchen layout. We used the same Franke sink as the one in the island, and a similar Perrin & Rowe faucet with a sidespray (in polished nickel), but a single hole style.  

When the counter was installed, and the sink was mounted, it was time to install the faucet. We realized that we had another design dilemma – we couldn’t install the faucet as it was designed, with the single lever on the right. If  we mounted this way, there would not be enough room behind the sink for the faucet handle to go all of the way back for the cold water setting – it would be prevented from moving in the full range of motion by the marble backsplash. So, we installed it with the handle in the front, allowing full range of motion side to side, and decided if it really bothered us we would find a replacement faucet.  Luckily, we got used to it very quickly, although guests often can’t figure out how to use this faucet.

This second sink is used for a variety of purposes, but it was designed to be the ‘scullery’ sink – the sink where all of the dishes are cleared to and washed up after meals.  My kitchen designer is very thoughtful about the processes in a kitchen and designing a kitchen so that everything has a work flow, and I have been really amazed at how beautifully our kitchen works and how it really works exactly as she had in mind from the time it was first sketched on paper.

I have also used this sink as a wine cooler/bar area during parties, filling it with ice and beverages.  Note how there are drainage grooves cut into the marble to the left of the sink. I got this idea from a friend, and I love how it looks – but in reality, I tend to wash my pots and pans in my island sink, and dry them on the range.
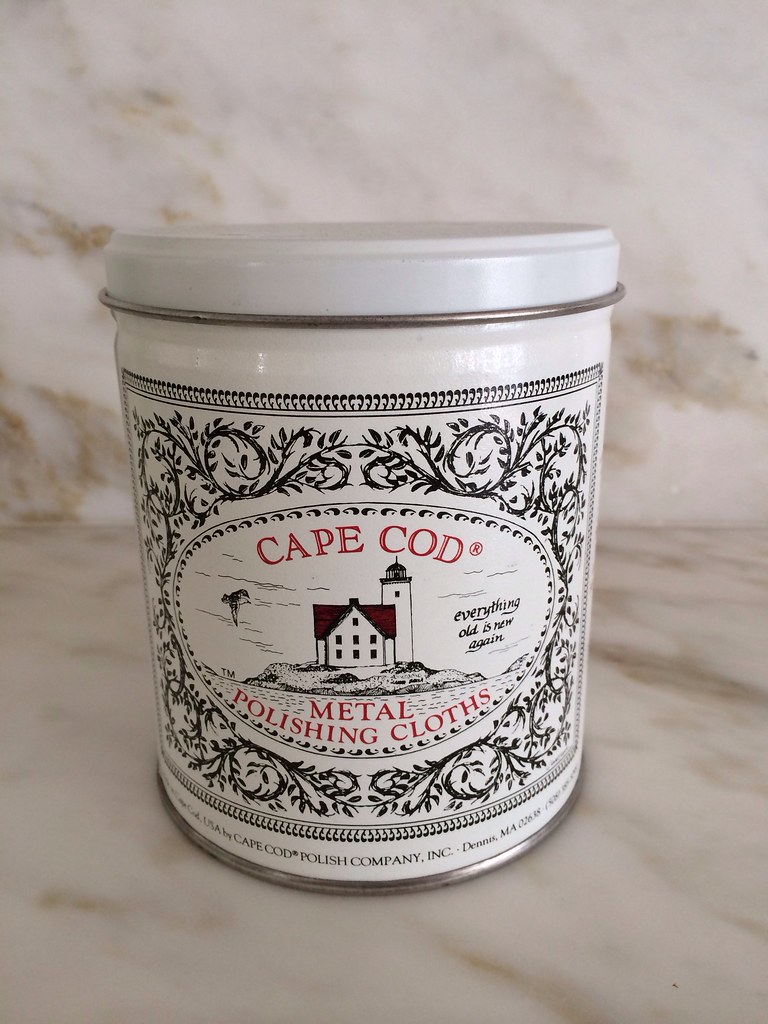
As I was writing this post, and looking at the pictures, I remembered a gift my sister gave me soon after we moved in – Cape Cod metal polishing cloths.  She said that her old designer swore by them for cleaning metals – including polished nickel – and making them look brand new. I pulled them out this weekend and polished my kitchen and bathroom faucets, and sure enough they worked beautifully – they got all of the water spots off and made the polished nickel look beautiful. I highly recommend them! I think they have a gentle cleaning substance on the polishing cloths, and the process is to polish with the pink cloth then buff with the white buffing cloth.

According to the side of the can:
Polish all your fine metals without the harsh chemical smell! Achieve a fast, fabulous shine on aluminum, brass, bronze, copper, gold, nickel, pewter, silver - just about any metal - with these easy to use, reusable soft polishing cloths. Due to the exclusive anti-tarnish formula, these unique pre-moistened cleaning cloths deliver an incredible shine that lasts! That means you clean less often - and they have a pleasant vanilla scent! The beautiful re-usable tin contains 12 individually wrapped 4" x 6" polishing cloths, one buffing cloth and one pair of re-usable gloves. Also available: re-closable foil pouch with two 4" x 6" cloths.
They can be purchased on Amazon here.

I hope this post helps anyone looking into kitchen sinks and faucets.  Let me know if you have any questions.  Another question I get all of the time is about my marble, and what I think about marble countertops after living with them for a few years. I am working on that post!

If you would like to comment on this post, click here. I try to keep my blog positive in tone, and appreciate the same courtesy when comments are made. Thank you!

Things That Inspire favorites


Things That Inspire Favorites: Cape Cod Metal Polishing Cloths

Things That Inspire Favorites: Oz Naturals Vitamin C Serum

Things That Inspire Favorites: Thera Breath Oral Rinse


To see my latest blog post, click here.
To subscribe to my blog by email, click here.
To follow my blog on Facebook, click here.
Twitter: @TTIBlog
Instagram: http://instagram.com/ttiblog
Pinterest: http://pinterest.com/ttiblog/
Visit my online store, Quatrefoil Design: www.quatrefoildesign.bigcartel.com

To see design, architecture, art, and decorative books that I recommend, please visit the Things That Inspire Amazon store.


Saturday, November 16, 2013

My oldest daughter’s bedroom (a work in process)


My oldest daughter’s bedroom is a comfortable and inviting space (and so much nicer than my room as a teenager!), but there are still a few items that need to be selected.  In general, I have taken a low key approach to my kids rooms. They are slowly coming together over time, with input from each child based on their likes and their personalities.   I thought I would work through my remaining thoughts on this room (perhaps to spur me into action)….so this post does not contain any ‘after’ photos! Hopefully that will come soon.

Things That Inspire: my daughter's bedroom
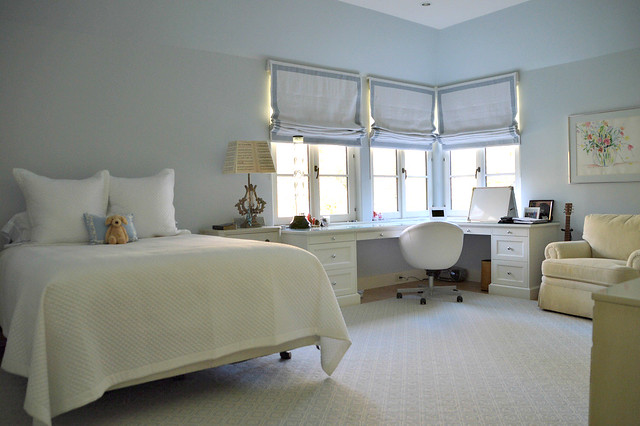
My oldest daughter has spartan taste and is pretty low key about décor. Her main request was to have blue walls – so we selected Farrow & Ball borrowed light, which is a truly beautiful shade of blue.  Her room is north facing and gets very soft natural light.  F&B borrowed light looks wonderful in the day and night (at night, the gray undertones come out) and is neither too babyish nor too sophisticated.
 
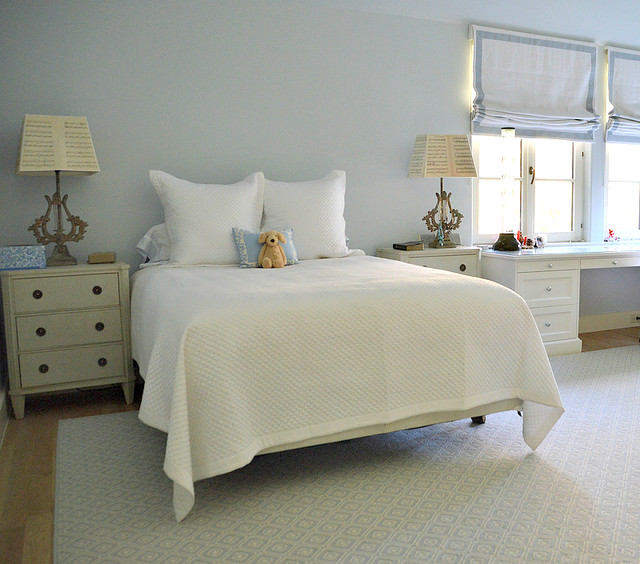
We have purchased very few new items for this room. The chair and a half came from our old family room. The furniture on the wall (only the edge can be seen in this photo) is Ethan Allen circa 1980s – it was in my sister-in-law’s room as a teenager. My daughter is very attached to it and displays all of her music awards and camp memorabilia in it, as well as a collection of snow globes.  The bedside tables were in the master bedroom in our old house, and the iron lamps were from a sample sale at the Mart (I liked the lampshades, which are made of antique music sheets). The watercolor was the very first painting I ever purchased – I love it as much as I did when I first saw it. 

My architect designed the built in corner desk for the room. The room is a somewhat unusual shape, as it is fit into both the roofline and a juncture of the house. The built in desk is my daughter’s favorite feature of the room; she a sophomore in high school, so she spends much of her time studying at that desk!  The desk chair is from IKEA. Keith Arnold designed the roman shades, which are white linen with a tape trim by Samuel & Sons. 

Things That Inspire: my daughter's bedroom
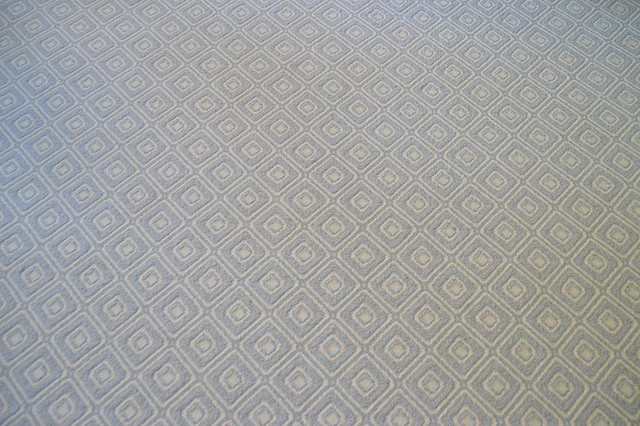
The most significant purchase for this room was the area rug, which we bought right away as the room has hardwood floors, and quite a bit of floor space; a rug was needed to warm things up. Many of my area rugs (as well as my stair runners) were ordered from John Horton at Underfoot Design.  His showroom is located just outside interstate 285 in Atlanta (John can brings samples and selections to your home or business in the greater Metro Atlanta area), and his prices are excellent. He has a large selection of in stock items, can source just about any line imaginable, and has the best installers in town.  John also specializes in hardwood floor selection and installation.

I picked out this geometric pattern by Stanton, as it has the color my daughter wanted (light blue) and she really liked the pattern. Although it is hard to see in this picture, there is a small amount of a flax color accenting the center of the squares/diamonds in the carpet threads.

Things That Inspire: my daughter's bedroom
So now on to the bed.  My daughter wants an upholstered head board, and given that the room has so much built in cabinetry, I think this will soften up the room and make it feel more finished (headboards always do that, don’t you think?).  I have been collecting images of headboards on Pinterest (see my headboard inspiration board here, my bedroom inspiration board here), and it has become clear that my daughter gravitates towards tufted headboards.

Here are some of the style candidates that we are considering:

Things That Inspire: my daughter's bedroom
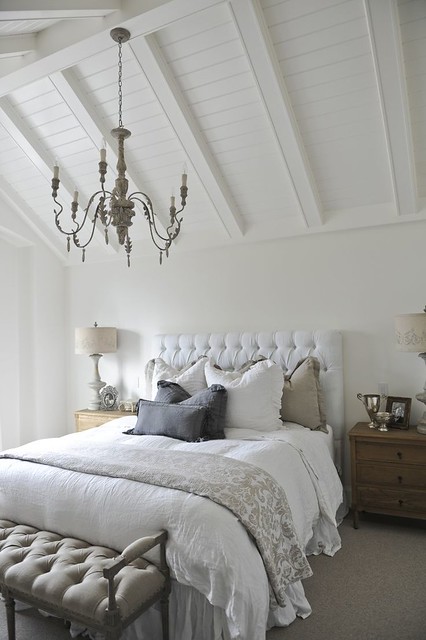
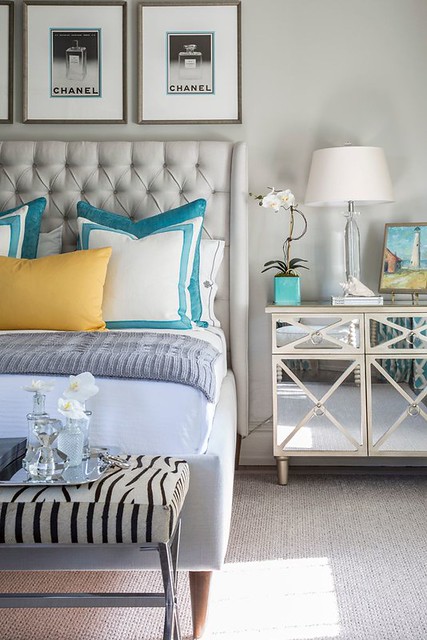
I have seen quite a few headboard with this style – tall and tufted, with a distinct edge on the left and right. This is a king size, so the tall design works well.
Things That Inspire: my daughter's bedroom
I just saw this one on the House of Turquoise, design by Beach Glass Designs. Gray is very on trend for bedrooms and headboards now.  This is a similar style to the first picture.

Things That Inspire: my daughter's bedroom
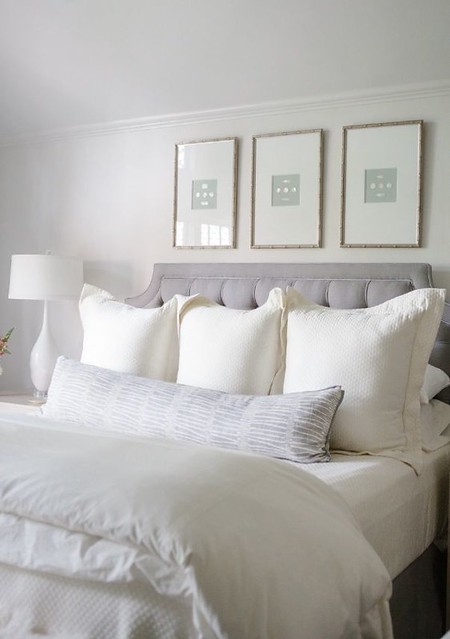
A squared off headboard in a simpler style. I think the height of this headboard is just right. It appears to be a queen size.

Things That Inspire: my daughter's bedroom
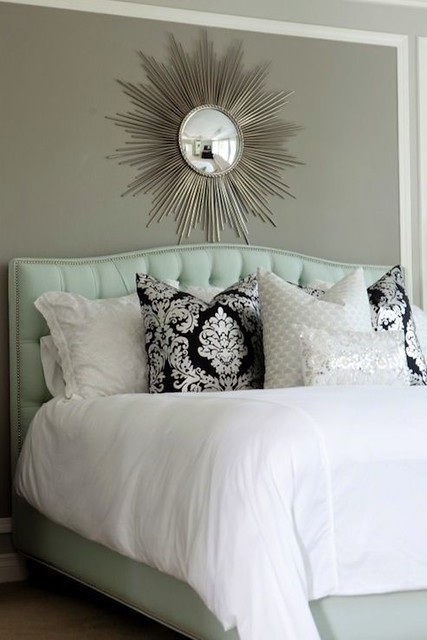
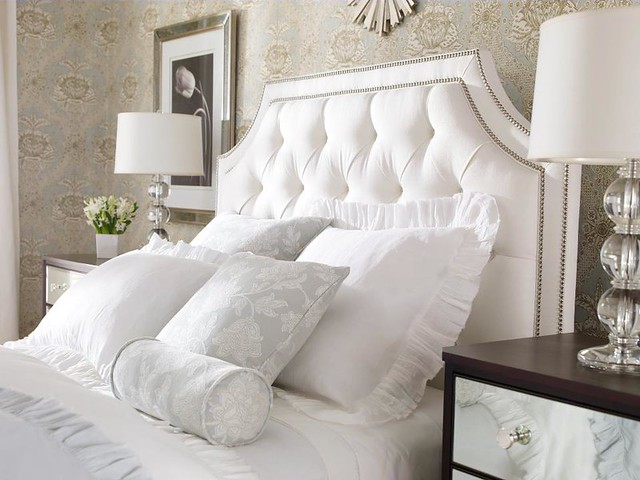
This one caught my eye – tufted, but with a gentle camelback curve. The nail head trim is a great detail.

Things That Inspire: my daughter's bedroom
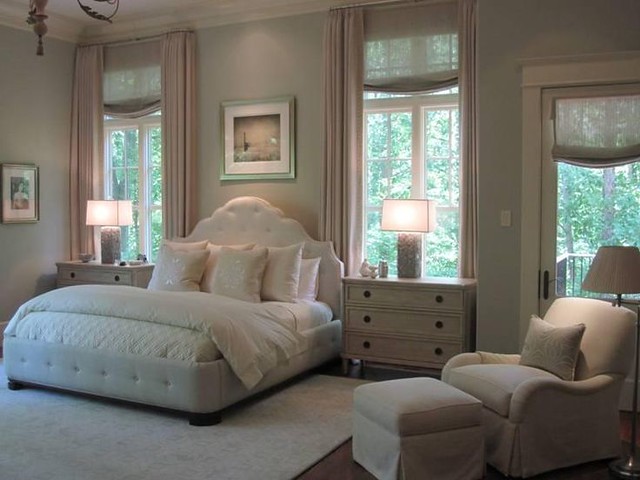
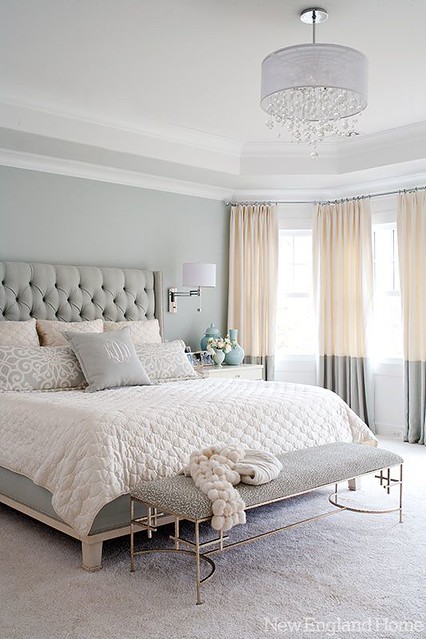
A bedroom by Phoebe Howard, the master of bedroom design. I love the feminine design of the headboard. It might be a bit fanciful for my daughter, but it certainly is beautiful. Note how the platform is also tufted.

Things That Inspire: my daughter's bedroom
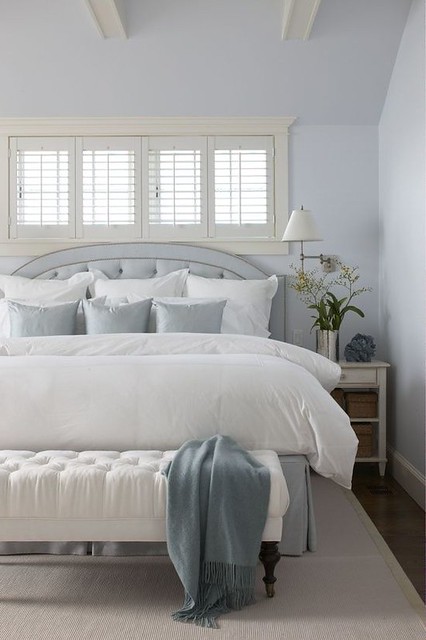
A pretty design by Griffin Balsbaugh Interiors, via House of TurquoiseThis picture also caught my eye because it is a blue bedroom, with blue fabric on the headboard. The color scheme of this room looks similar to that of my daughter’s room (although the fact that the rug is off white creates a different balance of the whites and the blues).  Given that my daughter’s rug has so much blue, I have the feeling that the fabric on her headboard should either be the white of the roman shades, or pick up the flax accent in the rug.  The style of this headboard is great – the double nail head trim is a nice touch. The tailored bed skirt is similar to what we will be doing.

Things That Inspire: my daughter's bedroom
My daughter likes this style and shape of this headboard – clipped curved edges, tufted with a border. She is not wild about nail head trim, however. Also, this style might be a bit high for her, although the advantage of the height is that the tufting detail can clearly be seen.  This also appears to be a queen size bed, so is a good comparison for proportions. Via Pinterest, source unknown.

Things That Inspire: my daughter's bedroom
Overall, this is my favorite inspiration picture. I love the shape and style – it still has a defined border, but none of the nail heads that don’t appeal to my daughter. I might go somewhat in between the height of this one and the height of the picture before this.  Design by Collins Interiors.

My daughter initially wanted a blue headboard, but is now leaning towards the same white linen that is used in the roman shades. Another option is to pick up on the flax color that is an accent in the rug.  The white linen is being discontinued so we need to act fast if this is the direction we will take!  We will have a custom tailored  bed skirt made to match the headboard.

So, what do you think? What’s your favorite style headboard?  What color do you think that the headboard should be?  What height do you think?  Opinions are welcome!

Favorite design and architecture books of 2013: http://www.thingsthatinspire.net/2013/12/books-from-2013.html


To see my latest blog post, click here.
To subscribe to my blog by email, click here.
To follow my blog on Facebook, click here.
Twitter: @TTIBlog
Instagram: http://instagram.com/ttiblog
Pinterest: http://pinterest.com/ttiblog/
Visit my online store, Quatrefoil Design: www.quatrefoildesign.bigcartel.com
To see design, architecture, art, and decorative books that I recommend, please visit the Things That Inspire Amazon store.
For advertising and sponsorship opportunities on Things That Inspire, please click here. We carefully select the sponsors that are featured on Things That Inspire, and only partner with those whose aesthetic and product is a good fit with the interests of our readers. Posts on Things That Inspire may contain links to sponsor sites.


Thursday, October 4, 2012

A successful party!

A beautiful bar set up for one of author Danielle Rollins' parties


We had a successful party last weekend (see my post on the pre-planning effort here)  – although nothing turned out as I expected, mainly because of the weather! More on that later….

Some of you commented that I was quite late planning a party that was taking place in a week.  This was a school sponsored party, so my only job was to have my house ready and think about space planning.  We had a team of parents who were working with the caterer on the food and drink, and managing the invitations and RSVPs.  It made things easy on me!
We were expecting 150+, and I have never had that many people over to the house, so I knew that where things were placed and how things flowed would be very important. 

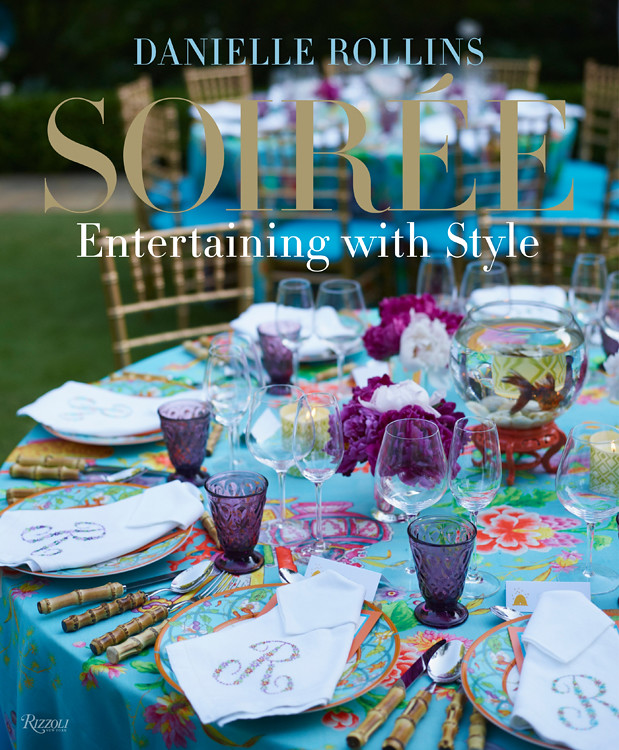
That’s why author and entertaining specialist Danielle Rollins (whose new book on entertaining was released this week) was such a big help; she has a tremendous amount of experience entertaining in all different situations.  The intent was for the party to be mainly outside, and we walked the property and discussed where to set things up.  We spent a little bit of time talking about how things should be set up in the event of bad weather – but since the past week had been picture perfect in Atlanta, we thought that was a remote possibility.

Here are some tips from Danielle that I thought were particularly good, and apply to all different sorts of party situations:
  • Think about who you are inviting, and what will make them most comfortable.  Do the guests know each other, or are you bringing together people from different backgrounds and perspectives? What seating/food/table set up makes most sense for the intent of the event.  For the event last weekend, the common bond was our 7th grade children, but it is a large grade with many new parents, so there are people who don’t know each other. A stand up reception featuring a light cocktail supper, with a little bit of individual seating, was most appropriate for the size and intent of our function. Also try hard to minimize any situation that might cause discomfort or intimidation during a party.
  • Danielle is very big on reusing things, and likes to avoid any purchases for a party that are for just one event. ‘Use what you have, and have what you use’ is one of her mantras.  If you plan on entertaining regularly, buy things that you can use for many different kind of parties – often keying the color to work with the environment (the colors you use in your house, or the colors of nature in the yard) are most versatile.   Danielle often mixes the high and the low, and often sources party supplies from IKEA and Cost Plus World Market.
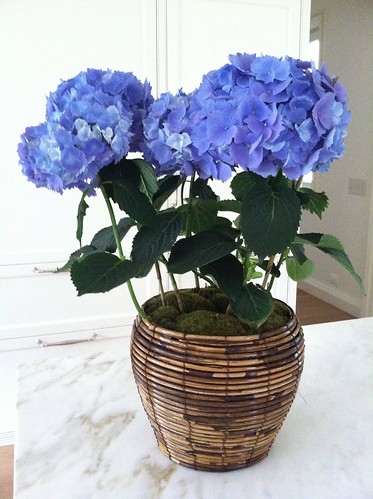
This was our centerpiece for the food table - a pretty potted hydrangea that the party planners gave me as a thank you gift.   The cut flowers I purchased have already faded, but this arrangement will last for weeks!
  • Danielle prefers to spend the budget on good food and drink, and not on flowers. She often uses things that are in her garden, or uses potted plants that can be put in a pretty planter and enjoyed for weeks or even months before and after the party.
Sometimes parties require more elaborate arrangements based on the formality of the event (this picture is from a formal event hosted by Danielle) but even a lower key event can make the bar pretty with candles in hurricane lamps, and a nice tablecloth with whatever you have at home.
  • For a large party like ours, she suggested setting up two bars to minimize wait time for drinks and to encourage party flow.  The main bar should be decorated in a special way – perhaps with a set of hurricane lamps with candles (enclosed flames are better for the bar). The secondary bar can be simpler and self-serve.  Also nice is to have a few easy but flavorful food items at the bar (like honey roasted peanuts, olives, thick cut chips) as people often like to nibble while waiting for a drink, or while mingling by the bar.
  • If the party is going to be indoors, and especially if it is not sit down, try to plan food that is not too greasy or oily and can easily be eaten with a fork or the fingers. Also, when selecting a menu, think about your guests (possible food issues) and try to have your food go well together from a flavor and type perspective.  For an event that is a light cocktail dinner, she likes for food to be passed – and the host/hostess are often wonderful food passers as it gives them a chance to interact with many of their guests in an easy manner. It is better to have fewer food choices that are very well prepared and not too fancy, versus many different options and esoteric choices.  Also, in Danielle’s experience, guests don’t tend to eat a lot of dessert if there is a meal, so keep the dessert items simple and small – and often it is best to pass dessert or bring it to the table if the guests are seated, otherwise it might not get eaten!
  • Have a bottle of ‘Wine Away’ stain remover on hand in case of spills (I already owned a small bottle, but have since ordered more on Amazon)
  • If your party will be large, it is helpful to clearly mark the powder room with a sign so that people don’t wander around opening up every door trying to find it (I did this and it worked well!).
  • If you are using caterers, make sure that everyone knows where the trash is located – what comes in must go out (and parties tend to generate a fair amount of trash). Set up trash cans near the bar and in discrete places, and have a location outside where all the trash can be placed. 


I started watching the weather a few days before the party.  A big system in the Gulf of Mexico started to form, but all predictions were for it to hit Atlanta after the party.

weather1
On Sunday morning, the satellite looked like this. Ever the optimist, I was hoping that the rain system would be very slow moving and come into the Atlanta late in the evening.

weather2
It was mostly overcast at 4 pm, with less than 2 hours until the party start, and I was feeling hopeful that the weather would hold though the party. Then I checked the radar, and saw the monstrous green blob that was about to descend on Atlanta.

So, the parent party planners and I decided to set things up inside, with the thought that we could still use the outdoor spaces for mingling if the weather held out.

weather3
And here was the radar at 6 pm, party start time.  Atlanta is the green pin seen in the middle – and we were at the start of a big long entrenched rain system with 150+ people expected at my house.

And it all worked out fine!  We had an amazing group of parents, great food from a wonderful caterer, plenty to eat and drink, and a fun time was had by all.  Our house was able to handle the numbers although it was close quarters at the peak of the party – but that made for a more intimate experience, and also ensured that most of the food was eaten!

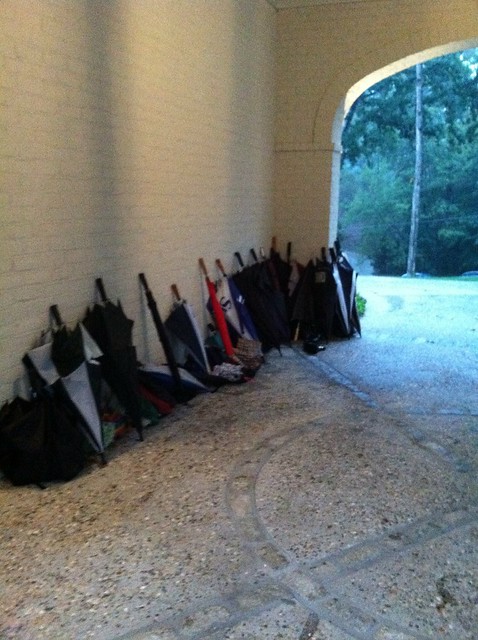
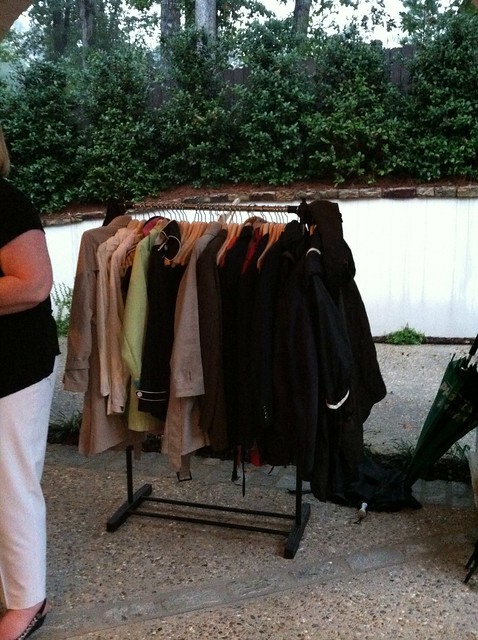
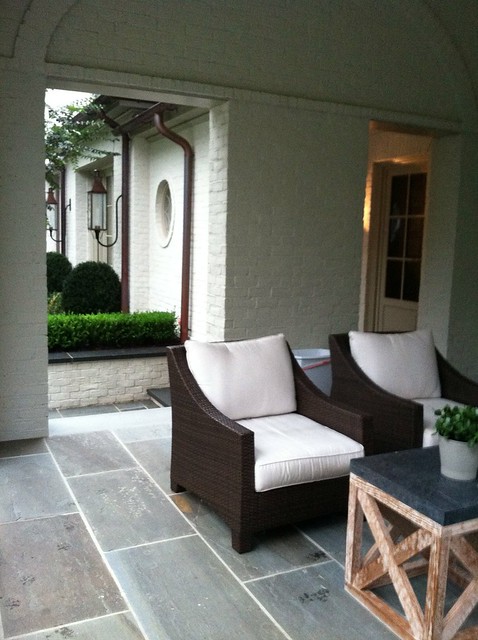
My brilliant friend Natasha suggested using a rolling rack for wet raincoats, and I happened to have one from a yard sale I had a few years ago.  When thinking about where to put it, I had the brainstorm to use our porte cochere (which is a covered side entrance for cars) as the entrance in case of rain – and it proved to be a very handy place for the wet umbrellas, the check in table for name tags, and the rain coats. We even had some passed hors d’oeuvres in here as it was the official starting point for the party, and it worked so well!  My side entrance is pretty so it was not strange to use it instead of the front entrance, particularly given the extenuating circumstances. The cool air that the rain brought made this a very pleasant place to be.

I tried to take pictures of the interior during the party, but they really did not turn out. It was very gloomy outside, and I had the lights dimmed on the inside (I will never forget the blog post by Maison 21 – back in 2007 – on the critical importance of dimmed lights when entertaining). There were so many people in just about every space (except for the dining room, since we did not put food in there and it was not a sit down type party).  We had more light in the kitchen, where the caterers needed it for their prep work – and where we had the food set up on the kitchen table, which is located right between the two bars we had set up. 

The one thing I might have changed– with the number of guests, and no possibility to go outside - it might have been better to have the caterers use the garage for their prep and staging.  It is fairly common to have the caterers use the garage when entertaining at home in Atlanta, if the weather is not too hot and the house has a set up conducive to this – it frees up the kitchen for the party. With so many kitchens now open to everything and central to the house, this makes a big difference.  But everything worked out just fine in the end.

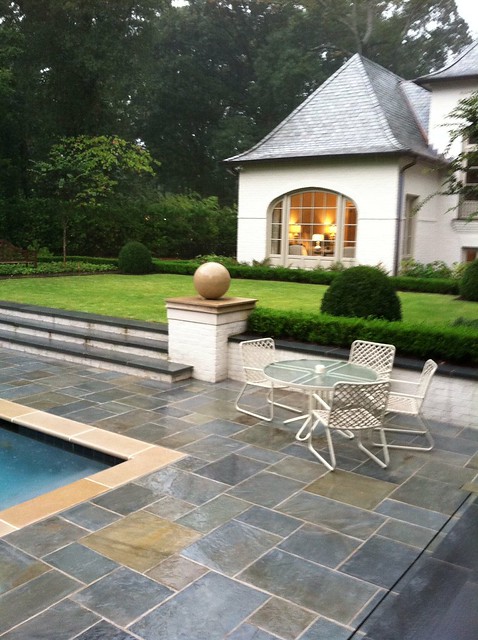
I would say that the location of the bar(s) is one of the most important decisions that we made – we put one in the corner of the living room (with a tarp underneath to protect the floors and carpet from spills and leaks), and had the containers holding the drinks just outside the door on the bluestone, so the bartender could easily access the supplies. We had a large Frontgate metal tub on the table with the open wines, ice, and a selection of beers, softdrinks, and water, and this was replenished from the extras on the bluestone patio, just outside the open door. Normally we put the bar outside on the bluestone patio, but it simply wasn’t possible because of the horrible weather. (I wish I had taken a picture of the bar at the beginning of the party!).

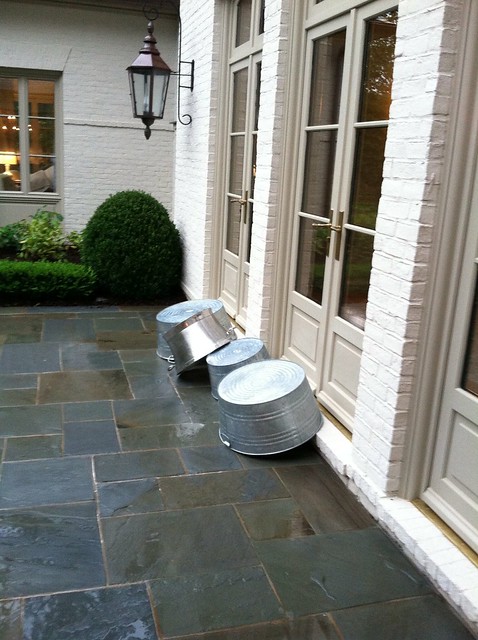
The morning after the party, the metal containers that held the drinks had drained – this shows you where we put them (although more in alignment with the far door, for easy access).

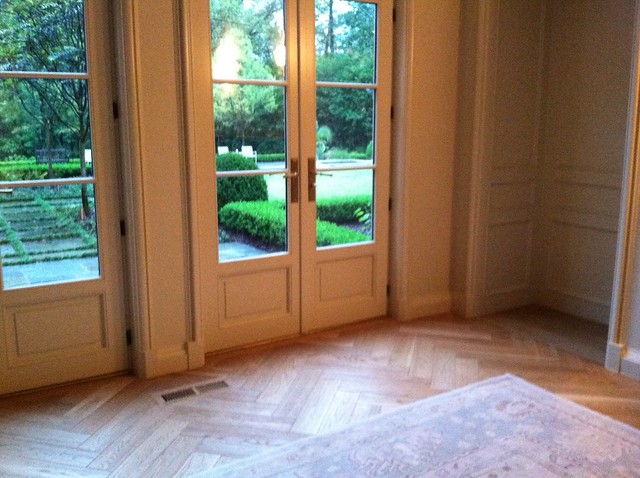
This picture was also taken the day after the party, but shows where we put the second bar – along the far wall in front of the opening.  We moved the two side chairs to either side of the fireplace, and moved the sofa as far back as it could go. The bluestone top tables weigh a ton and we decided to keep them where they were! Our original plan was to have a second bar by the pool, but again the weather required us to make some last minute changes. During the party, this area was full of people, and the two locations of the bar (with the food on the kitchen table in between) created a wonderful flow throughout the house, and allowed for people to spread out.


I have had the chance to read Danielle Rollins’ new book, Soiree: Entertaining with Style and thoroughly enjoyed it!  It is a lovely book, and combines great tips on entertaining and thinking through an event, with a fascinating peek into a glamorous lifestyle, as well as glimpses of beautiful interior and garden design.   The book is written in a fun and lighthearted style, and is well organized to profile 15 parties that Danielle has held (from large to small), with the preparation, decisions, and menus outlined and discussed for each party.  Many of these parties also take place in fabulous locations including Miles Redd’s NYC brownstone, Lela Rose’s lovely NYC abode, a villa in France, and Danielle’s own beautiful home (including a party in her Indian theme theater room, which has not been published before). Woven throughout are entertaining tips and tricks which are applicable to any party, large or small.

Houses, gardens, people, lifestyles, recipes, entertaining – all in one. I thoroughly enjoyed it, and it is a beautiful book to have on the coffee table too!  To purchase on Amazon, click here.

To subscribe to my blog by email, click here.
To follow my blog on Facebook, click here.
Twitter: @TTIBlog
Pinterest: http://pinterest.com/ttiblog/
Visit my online store, Quatrefoil Design: www.quatrefoildesign.com
To see design, architecture, art, and decorative books that I recommend, please visit the Things That Inspire Amazon store.
Wednesday, July 11, 2012

Dutch doors


When we planned out the details for the house we built, I was secretly hoping that we could incorporate a Dutch door somewhere in the design.  I am not sure why I had this on my list of things I wanted – I have never had a Dutch door, and I have not seen many of them in houses.

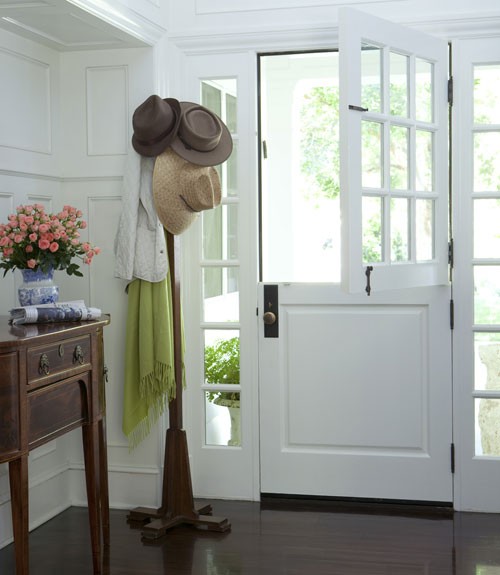
A Dutch door is simply a door that is divided horizontally. which enables the top portion and the bottom portion to operate independently. The advantage of this is that the bottom can be closed, while the top is open.  According to Wikipedia, “the initial purpose of this door was to keep animals out of farmhouses, or keep children inside, while allowing light and air to filter through the open top. This type of door was common in the Netherlands in the seventeenth century and appear in Dutch paintings of the period” (source).   Note the Dutch door in a painting dated 1645 by Samuel can Hoogstraten . Image source.

I see Dutch doors from time to time in Atlanta, mainly in the casual entrance (or friend’s entrance, as I have heard it called) of a home.  In Atlanta, given the weather and climate,  it seems as if the function is more charm that practicality; I wonder how many Dutch doors are actually utilized in the way in which they were designed given the mosquitos, pollen, and heat that are the norm in Atlanta much of the year!  I can see an exterior Dutch door used a lot at the beach, where catching the breezes is ideal, or in a climate where there is little need for central air or heat. Perhaps those shoulder months when it is pleasant outside, and there aren’t too many bugs or allergens in the air.  Regardless of aesthetics versus function, a Dutch door is a wonderful way to create that indoor/outdoor connection.

A splendid example of a Dutch door, in a space by Windsor Smith.  I love the turquoise tone that faces the outside.   Upon closer inspection, this appears to be a ‘double Dutch door’.

Image via House Beautiful, design by Windsor Smith.  In the magazine, Smith notes that for this particular house, a Dutch door was incorporated as it is a garden house, and the Dutch door was an ideal way to bring nature in.

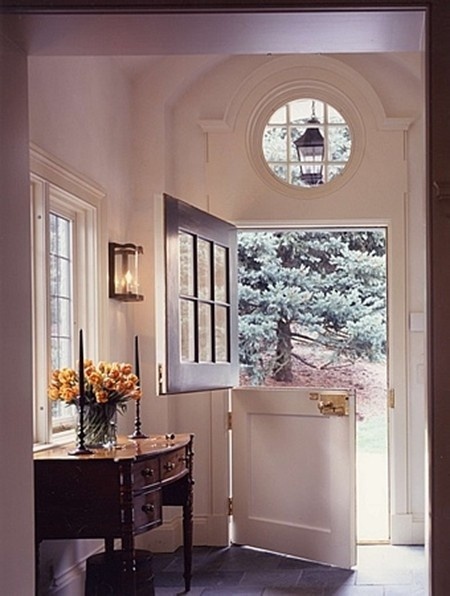
Another striking image of a Dutch door (source unknown) with a beautiful architectural feature above – an overdoor with a round window.

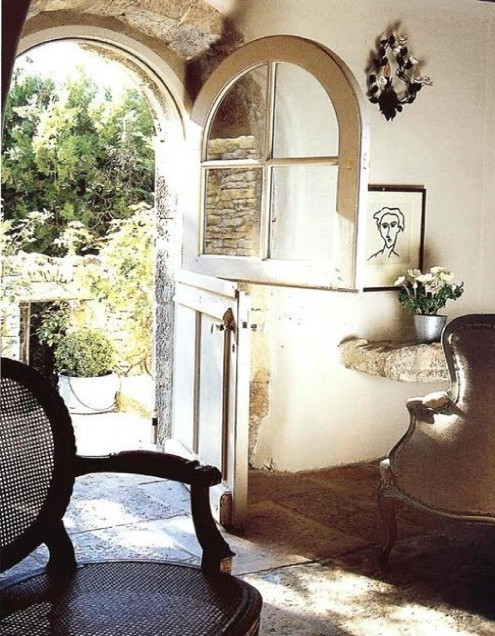
This picture (source unknown) is quintessentially European, with the rustic elements, the stone floor inside and out, and the the beautiful rounded Dutch door.

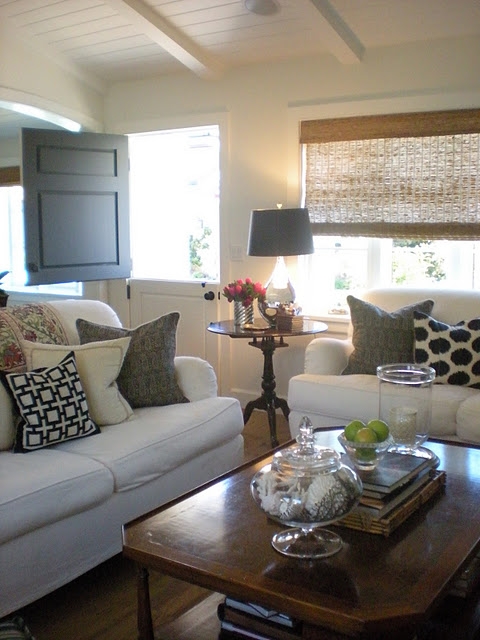
This picture has a more American flair, and seems like a beachy environment given the colors and the architectural details.  A charming space, and the Dutch door makes it even more so.  BHDM Design, via House of Turquoise.

I have seen this picture quite a few times, but never really tuned into the fact that there is a Dutch door. Note the low height of the bottom portion of the door.  There are dozens of decisions behind every element in this photo! Image source, interiors by Amy Morris.

This looks like a very convenient position for a Dutch door – very easy to bring the groceries into the kitchen! Note how the door knob of this Dutch door is in the center of the door. Source unknown.

In this interesting space, it appears as if both sets of doors are Dutch doors.  Architecture by Jones Pierce Architects; interior design by Lori Tippins.

I would love to see the rest of the room to understand where it is in the house – it seems like an unusual place for a Dutch door.

I adore this image – the paneling on the Dutch door, and the dark color in contrast with the white exterior and interior, are beautiful. When a Dutch door is on the exterior, extra care must be taken to ensure that the locking mechanisms are adequate for the door. Note how high the lower part of the door is. Image source.

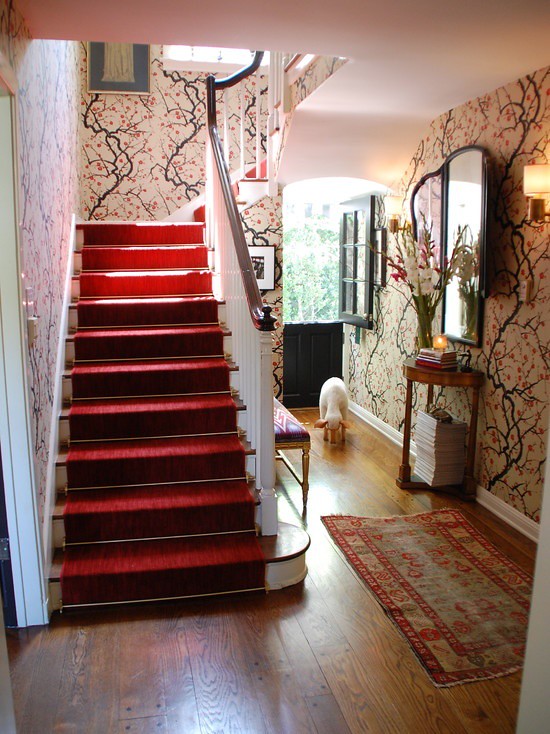
This room is fabulous all around – the wallpaper is one of my favorites.  I love how the stair carpet picks up the red tones in the wallpaper, and the Dutch door picks up the dark tones of the wallpaper.  The door is tucked under the stairs, creating an intimate and charming space.

This Dutch door, from a kitchen featured in Cote de Texas’ reader’s kitchen series, is charming both because of its placement in the kitchen, and the lovely blue color that is picked up in other design elements in the room.

A view of the kitchen with the Dutch door opened. The door swings out, which means it does not take up space on the interior (although most exterior doors seem to swing in, the door swing is often based on the physical constraints of the space – and this decision must be made carefully and thoughtfully while remodeling or construction!).    The kitchen’s owner had grown up with a Dutch door, so she wanted one in her house. She notes that the downside is that there is no screen.  To see post, click here.

Designer Michael Smith’s former home in Malibu had a Dutch door.

As I was looking through these wonderful images of Dutch doors, I realized that the vast majority show doors that go to the outside.  In my house, none of the doors that go to the outside were really ideal for a Dutch doors (instead, we did a lot of French doors), either in looks or functionality.  However, people do use Dutch doors on the interior too, and this is what we decided to do (more on that later).

I have read stories on Gardenweb of people using Dutch doors on laundry rooms, in public areas of their house (instead of a baby gate), at the entrance of a basement. I found a few examples that seemed to have a unique functionality inside a house.

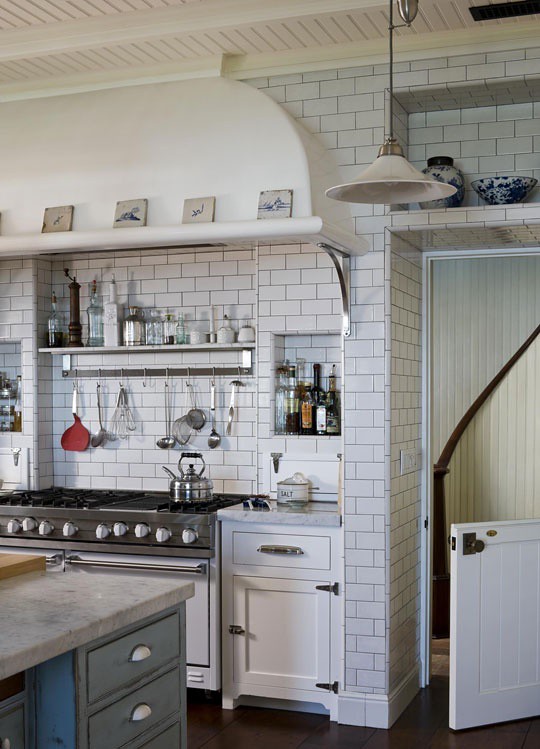
Here is a great interior picture of a Dutch door, right in the middle of the action.  Dutch doors are wonderful for keeping kids and animals in spaces where you want them, without compromising an open feel to a door opening.  On another note, I had not seen this picture before, and I love the niches to the left and right of the stove, and the shelf above the stove. This is an interesting kitchen!

This appears to be a butler’s pantry, although it could be the main part of the kitchen. I wonder if the room beyond the Dutch door is a laundry room? Via Houzz.

I really like this picture of a Dutch door used in a little girl’s room.  My initial thought is that as the child got older, the Dutch door would be used less and less, but upon thinking further, I sort of wish that my teenage daughter’s room had a Dutch door – her door is always closed, which seems to unwelcoming – I would much prefer it to be ‘half closed’ with a Dutch door!

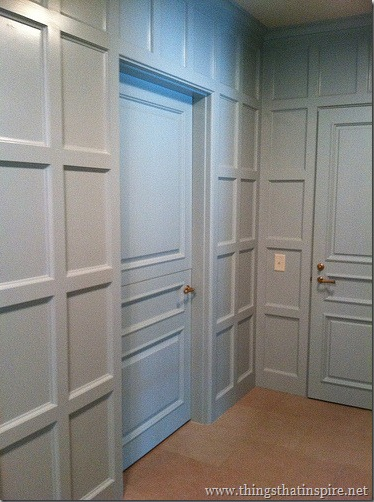
Here is a picture of the interior Dutch door that we incorporated into our design.  This picture shows how we closely matched the style to that of our other doors (the door to the right leads to the garage), but incorporated the top and bottom door. The Dutch door is shut and latched in this picture, which is a rare thing – we usually have it unlatched.

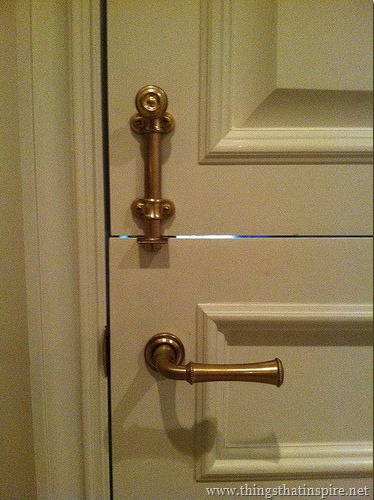
The latching mechanism is quite simple – just put the bolt down (on the inside of the door) when you want the door to operate as a regular door. Unlatch when you want the Dutch door. We keep it unlatched 95% of the time, and the top door swings out of the way into the laundry room.

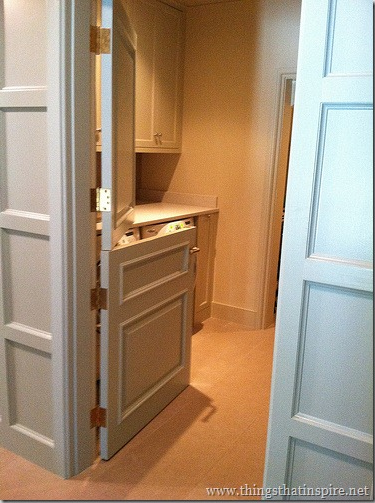
Our Dutch door opens to the downstairs laundry room, and the entire area serves as a sort of mud room/storage area/occasional laundry room/dog area.  We use this room a lot because of all the functions it serves!  The main part of the space is laundry, a farm sink, and storage, and in a separate space tucked under the stairs is where our dog Ben sleeps at night in his crate.  He seems to loves it there - we often find him hanging out in this space during the day, as it is quiet and cool (the floor is limestone, which is particularly appealing to Ben during the summer as it stays so cool).

We put the Dutch door leading into the laundry room primarily because it creates a safe place for Ben when we have guests or contractors (when you build a house, you tend to have quite a few contractors coming in and out over the first 6 months!), but it does not make the space feel closed – it still provides light and air and a feeling that the space is still part of the next room.  The position you see the door in above is how we have it the majority of the time so that Ben can get in and out (his water and food bowls are in his area under the stairs).

Our Dutch door was made when all of the other doors were made, so I can’t really provide details on how it was made or who made it. Gardenweb seems to have some good DIY Dutch door pictures and examples.  The color on the walls in the paneled mud room is Whistler by ICI Dulux (this area gets little natural light, so the color looks quite gray-blue - in the light it is much more blue); the color inside the laundry room is Benjamin Moore Manchester Tan.  The floors are limestone with as small of a grout line as possible.  All door hardware is by Baldwin in their vintage finish.  The cabinet hardware is by Restoration Hardware; cabinets are custom.  The sink in the laundry room is a Shaws Original farmhouse sink.

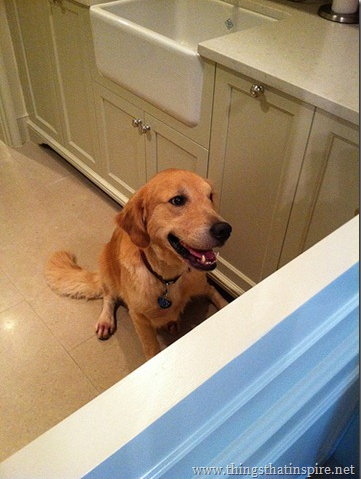
A posed picture of Ben, behind the Dutch door.  He likes to be out with the family, so we rarely put him in here with the door shut, but it is very handy for those times when it is best that he is contained.

What do you think about Dutch doors? Do you see many of them in your area?  If you have one, let me know how you use it!  To comment directly on the blog, click here.


Things That Inspire Favorites: Cape Cod Metal Polishing Cloths

Things That Inspire Favorites: Oz Naturals Vitamin C Serum

Things That Inspire Favorites: Thera Breath Oral Rinse


QD collage

To subscribe to my blog by email, click here. 
To follow my blog on Facebook, click here. 
Twitter: @TTIBlog 
Pinterest: http://pinterest.com/ttiblog/ 
Visit my online store, Quatrefoil Designwww.quatrefoildesign.com 
To see design, architecture, art, and decorative books that I recommend, please visit the Things That Inspire Amazon store.
LinkWithin

Related Posts with Thumbnails